


What to Expect During Garage Epoxy Installation, Step by Step
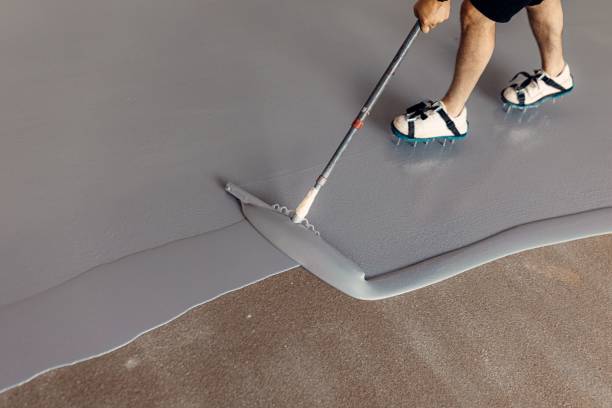
Understanding the full garage epoxy installation process helps homeowners know what to expect before, during, and after their project. From initial concrete prep to the final protective topcoat, here's a look at how professional garage epoxy flooring comes together.
Step 1: Assessing the Concrete Surface
Every garage epoxy installation begins with an assessment of the existing concrete, checking for cracks, moisture issues, or previous coatings that might affect how well the new epoxy bonds. This step helps determine the specific prep approach needed for a long-lasting garage epoxy result.
Step 2: Clearing and Preparing the Space
Before installation begins, the garage needs to be completely cleared of vehicles, storage items, and any other belongings, since the entire floor surface needs to be accessible for proper garage epoxy installation. This is also when any existing floor drains or fixtures are protected or accounted for in the installation plan.
Step 3: Repairing Cracks and Damage
Any existing cracks in the concrete need to be filled and repaired before garage epoxy application, since applying epoxy over unaddressed cracks means those imperfections will likely show through or worsen over time. This step ensures a smooth, uniform surface for the epoxy coating to bond to.
Step 4: Mechanical Surface Preparation
Professional garage epoxy installation typically involves diamond grinding the concrete surface, which opens up the material's pores and creates the ideal surface profile for strong epoxy adhesion. This step is far more effective than the acid-etching method often used in DIY garage epoxy kits, and it's one of the primary reasons professional installations last significantly longer.
Step 5: Checking for Moisture
Before applying epoxy, professional installers typically test the concrete for moisture vapor emission, since excess trapped moisture in concrete can cause epoxy to fail prematurely regardless of how well the rest of the installation goes. Addressing any moisture concerns before application helps ensure long-term adhesion and durability.
Step 6: Applying the Base Coat
Once the concrete is properly prepped and confirmed to be in suitable condition, the base coat of epoxy is applied evenly across the entire floor. This layer forms the foundation of the garage epoxy system and needs to be applied within a specific working time window to avoid inconsistencies in texture or color.
Step 7: Adding Color Flakes, If Desired
For homeowners choosing a flake system, decorative color chips are broadcast into the base coat while it's still wet, allowing them to embed properly into the epoxy for a durable, integrated finish rather than sitting loosely on top of the surface.
Step 8: Applying the Topcoat
After the base coat and any flakes have properly cured, a clear protective topcoat is applied over the entire garage epoxy floor. This topcoat adds an extra layer of durability, chemical resistance, and gloss, protecting the color and flake layer underneath from scratches, stains, and general wear.
Step 9: Curing Time
Garage epoxy flooring needs adequate time to properly cure before the garage can return to normal use. While the surface may be walkable relatively soon after application, full curing, when the epoxy reaches maximum hardness and durability, typically takes longer, and it's important to avoid driving vehicles onto the floor until this curing period is complete.
How Long Does the Full Garage Epoxy Process Take?
Between prep work, application, and adequate curing time, a professional garage epoxy installation typically spans a few days from start to finish. Rushing this timeline, particularly the curing stage, is one of the most common reasons garage epoxy floors fail prematurely, which is why experienced installers build in appropriate time for each step.
Tips for Homeowners Preparing for Garage Epoxy Installation
Planning for alternative parking or storage arrangements during the installation and curing period helps the process go smoothly. It's also worth discussing your specific timeline needs with your installer in advance, particularly if you have any upcoming events or needs that depend on garage access.
Why the Full Process Matters for Garage Epoxy Results
Each step in professional garage epoxy installation, from thorough concrete prep to proper curing time, contributes directly to how long the finished floor will last. Skipping or rushing any of these steps is what separates a garage epoxy floor that lasts a decade or more from one that fails within just a year or two.

Ready to see the process in action for your own garage? Request your free garage epoxy estimate today.

Making your dreams reality


